
 Is your RV ready for the upcoming camping season?
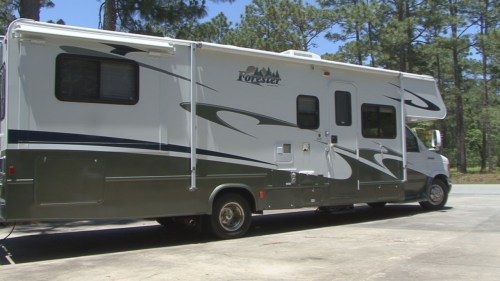
When I park our RV after the last trip of the season I look forward to this time of year rolling around again, time to go camping. Last winter I was a little lazy and put the RV in storage knowing there were some maintenance related issues that would need to be addressed this spring. When you combine those items with routine spring preparation checks you need to dedicate some time to get the RV ready to go camping again.
If you follow my work you have more-than-likely heard me use the term preventive maintenance. I spent an entire career in the Army teaching young soldiers the value of preventive maintenance, and a second career passing the same valuable lessons on to RV owners. For those of you not familiar with the term, preventive maintenance is maintenance you perform on your RV, automobile, house or anything else before a problem exists. Preventive maintenance checks are designed to prevent or identify potential problems that could lead to mechanical breakdown, malfunction, or failure of a component or system on your RV. It consists of cleaning, inspecting, lubricating, adjusting and servicing your RV.
To go one step further with my explanation I like to explain that a lack of preventive maintenance and/or scheduled maintenance will eventually result in emergency maintenance. For example, if you don’t check the air pressure in your tires (preventive maintenance) the under-inflated tire over heats and prematurely fails resulting in (emergency maintenance). Emergency maintenance usually leaves you stranded alongside the road, not exactly how you want to start the first RV trip of the season!
To learn more check out our RV Care & Preventive Maintenance Video Course
Preventive maintenance is really nothing more than common sense maintenance. If you’re going to take a thousand mile trip in your automobile, common sense tells us at a minimum to check all of the fluid levels, and the tires and lights on the vehicle. Unfortunately lots of folks assume all of the fluid levels are okay, and the tires look like they are inflated properly so why check them. These assumptions are why we have unexpected breakdowns.
Now consider an RV. It is larger and heavier and taller than your automobile and its not just the chassis you need to be concerned with, it’s the entire house sitting on top of the chassis. The good news is, the average RV owner can perform the required preventive maintenance and prevent untimely breakdowns and costly repairs. To assist with your RV spring preparation this is a checklist from my best-selling e-book, Checklists for RVers
RV Spring Preparation Checks
- If your RV was winterized it will need to be de-winterized. If you used non-toxic RV antifreeze to protect the water system you need to run fresh water through the entire plumbing system until all traces of the antifreeze are removed. Hopefully no antifreeze was added to the fresh water holding tank. If it was, the first step is to drain any remnants from the tank. Next, add potable water to the fresh water holding tank, turn the water pump on and open all of the water faucets. When clear water is running through the system turn the pump off and close the faucets. Take the water heater out of the by-pass mode (if applicable). If the water heater wasn’t bypassed the antifreeze needs to be drained from the water heater tank too.

- Next I recommend sanitizing the RV water system. Caution: If you have an on-demand water heater with a copper heat exchanger, the water heater must be by-passed. Do not run chlorinated water through the water heater.
- With the water system sanitized turn the water pump on to pressurize the system and inspect the plumbing for any water leaks.
- Check the operation of the toilet.
- Remove any protective covering that were put over exterior vents to keep insects or rodents out.
- Check any mousetraps you put in the RV. Open all the doors, drawers and compartments and check for rodent intrusion.
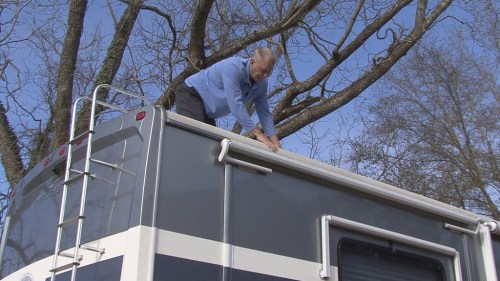
- Inspect the interior and exterior and all seams and sealants for any signs of water damage. Caution: When working on the RV roof be extremely careful. A fall can result in serious injury or death. Every seam on your RV, and anywhere the RV manufacturer cut a hole in your RV has the potential to leak. It’s important you take your time and thoroughly inspect all of these seams and sealants on the RV. I recommend inspecting and resealing the seams and sealants on the RV at least twice a year, and possibly more often depending on storage conditions. Inspecting the seams and sealants as part of your spring checks will help identify any damage that occurred during winter storage, and help prepare the RV for this year’s camping season. During your inspection of the RV roof seams and sealants look for signs of cracking or lifted sealants. It’s important you consult your RV owner’s manual, or your local RV dealer for sealants compatible with the different types of materials you are attempting to seal. Watch How to Apply Lap Sealants video
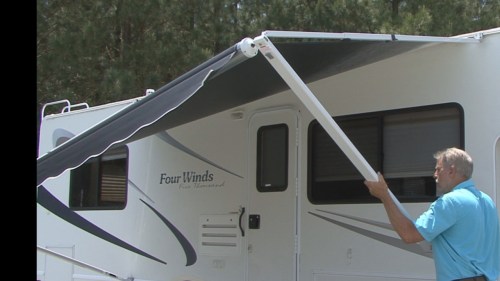
- Inspect the operation of the awning and inspect the awning fabric. Clean the awning if necessary and let the fabric dry thoroughly before stowing. Read my RV Awning Care & Maintenance article
- Inspect the tires for signs of wear and any cracking in the sidewalls. If there are cracks in the tire sidewalls have the tires inspected by a professional prior to using the RV. Tires lose a percentage of air pressure sitting in storage. Your RV tires can lose 2-3 psi a month, this means they could be dangerously low on air pressure.
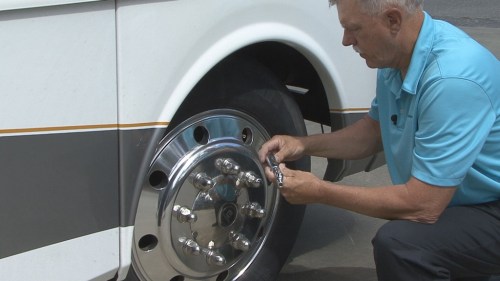
- Check the tire pressure in all tires with a good tire inflation gauge and adjust the inflation pressure to the manufacturer’s recommendation based on the load. Don’t forget the spare tire! Remember, failing to maintain correct tire pressure based on the load can result in fast tread wear, uneven wear, poor handling, and excessive heat which can lead to tire failure. Tire manufacturers publish load and inflation tables that should be followed for proper inflation pressure.
- Lubricate all hinges and locks with a spray lubricant. Use a dry graphite type lubricant that does not attract dust and dirt.
- Inspect and clean the RV’s interior.
- Plug any appliances in that you unplugged for storage.
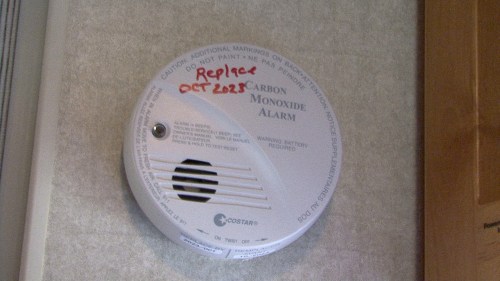
- Test the operation of the carbon monoxide detector, LP gas leak detector and smoke alarm. When your RV sits in storage it’s quite common for dry cell batteries in safety devices to die. Replace the batteries in all safety devices and test the operation of the carbon monoxide detector, the LP gas leak detector and the smoke alarm. Lots of RV owners are not aware that safety devices in RVs have expiration dates. I recommend you write the expiration date on the front cover so you remember to replace it when it reaches the expiration date.
- Inspect all fire extinguishers to make sure they are fully charged. If you have a dry chemical fire extinguisher turn it upside down and tap the bottom several times to release any powder that settled to the bottom. Review how to properly use a fire extinguisher in the event you need to use it.
- Reset any breakers that were turned off. If you removed any fuses for storage re-install them now.
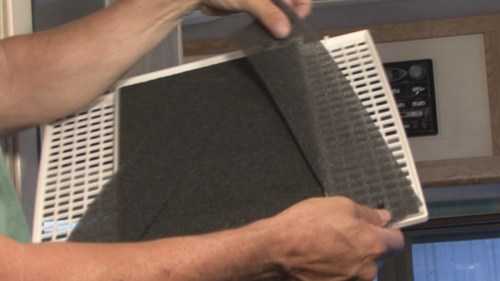
- Clean or replace air conditioner filters if it wasn’t done prior to storage and remove any covers that were put over the rooftop air conditioners.
- Open vents and windows and air the unit out.
- Inspect the RV batteries. The condition of your batteries depends on how well they were cared for when they were in storage. If the battery was removed for storage, reinstall the battery and make sure it is connected properly. Clean the terminals and clamps.

- A battery in storage can lose up to 10% of its charge every month. If you checked and re-charged the battery periodically during storage the battery should be ready to go. If you did not check the battery while in storage check the state-of-charge now and re-charge as required. Note: Water should only be added to lead acid batteries after fully charging the battery, unless the water level is already below the plates. The plates need to be covered at all times. After the battery is fully charged check and add distilled water as required. If you are not comfortable working on or around batteries have the battery maintenance done by a qualified service facility.
- Check the operation of the steps. Lubricate the step hinge points. Watch our RV lubrication video.
- Test the operation of the hydraulic jacks if applicable. Check hydraulic fluid level.
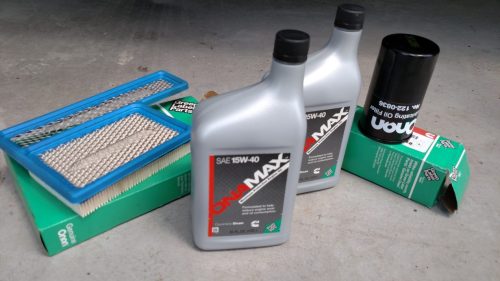
- If your RV has a generator and you didn’t change the oil and filters prior to storage this is a good time to do it. Inspect the generator exhaust system for damage prior to starting. Start and run the generator for an hour or two with at least a half-rated load on it. Consult the generators owner manual for load ratings. Caution: Do not operate a generator in an enclosed space, Carbon monoxide is deadly. Read my Generator Maintenance article
- Turn the generator off and plug the unit into shore power. Turn the refrigerator on in the electric mode. Allow sufficient time for it to cool and check for proper operation.
- Check all 12-volt interior lights and accessories.
- Test the monitor panel for proper operation.
- Check the operation of slide-outs if applicable.
- Check the remaining 120-volt appliances for proper operation.
- Test the Ground Fault Circuit Interrupter (GFCI) for proper operation.
- Turn the refrigerator off, leave the doors open and allow sufficient time for it to get to room temperature so it can be checked in the LP gas mode. Note: The LP gas system should have a leak and gas operating pressure test performed by an authorized RV repair facility annually.
- Turn the LP gas valve on at the cylinders or tank and check the operation of all LP gas appliances. Make sure the water heater is full of water before testing the water heater. If an LP gas appliance is not operating properly have it inspected by a RV repair facility.
- If it is a motorized RV and you didn’t change the engine oil and filter prior to storage this would be a good time to do it.

- Check all fluid levels in the transmission, power steering, engine coolant, engine oil, windshield washer and brakes. Consult the vehicle owner’s manual for proper levels and types of fluids.
- Start the engine and check for proper readings on all gauges.
- Check the condition of the windshield wiper blades and replace if necessary.
- Check the operation of all lights.
This checklist is not all-inclusive, but it’s a good start. You can add or delete from the checks on this list and tailor it to your specific needs. Now for the fun part, load your clothes, food, and personal belongings, hit the road and have fun exploring this wonderful country we live in.
For more information on maintaining your RV check out our RV Care & maintenance training
Subscribe to our RV 101® Youtube Channel

Happy RV Learning,
Mark Polk
Subscribe here to receive our free RV Education 101 monthly newsletter


You must be logged in to post a comment.