Today we’re going to tackle an RV floor covering do-it-yourself project in our used RV project 5th wheel trailer.
Click here to watch other DIY videos on our used RV project 5th wheel trailer.
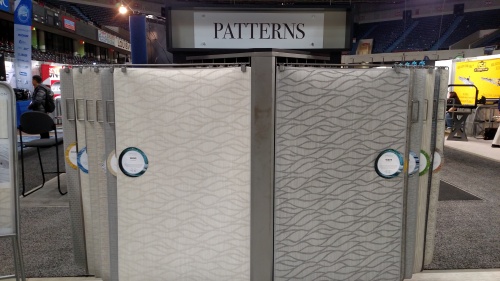
The original floor covering in the RV is showing some age and we thought it would be a fun weekend project to replace it. When it was time to decide on a new floor covering we wanted something that was rated for commercial traffic, and that looked good too. After some research I found Infinity Luxury Woven Vinyl. Infinity LWV products are popular in the marine industry and they are making a presence in the RV industry too. Infinity offers numerous collections of luxury woven vinyl products in more than 100 colors. We decided on the Linen luxury fabric because it highlights some of the RV’s interior treatments. 
Infinity luxury woven vinyl is anti-microbial, soil and stain resistant, fade resistant and easy to clean. It has a dense cushion backing, and its pet friendly which is great for us. Here is how we installed Infinity LWV flooring in the RV.
The first step of the pre-installation process was to determine where we wanted the new flooring and then remove the existing flooring, which in our case included carpet and vinyl.
With that done we can start on the installation. It’s important to note when you work with this product it must be rolled face out, with the cushion in. Do not crease the fabric at all. The warranty is voided if it is rolled wrong, creased, or if the product was cut, fitted or installed. Let’s get started.
Note: Prior to cutting the product inspect it for any problems. If the fabric does not meet your expectations contact Infinity’s customer support.
Preparing the Floor for Installation

 The floor must be smooth, clean, flat, and dry with no dirt, dust, wax, glossy paint, or any other foreign material. Sand uneven surfaces smooth or fill in gaps as needed. When filling gaps with a latex-fortified Portland cement underlayment, a primer or sealant should be applied over the cement to ensure successful adhesion. Glossy or metallic surfaces should be sanded to dull the surface.
Installing Luxury Woven Vinyl™ (LWV) on Floors
This product has a vinyl back and must be installed using a solvent-free, latex-resin adhesive that works with vinyl. Adhesive should also be nonflammable and freeze-thaw stable. Adhesive and woven vinyl must be acclimated on-site. The minimum temperature should be no less than 65°F for 24 hours before, during, and after the installation.
The product should be spread flat and laid open for up to 30 minutes before applying to the floor. This method insures best adhesive transfer. A 100% transfer of adhesive onto the foam backing must be obtained.
I decided the best way to get accurate cuts was to make a template. The best template I could think of was the old flooring we removed from the RV. I laid the template on the woven vinyl product and carefully made my cuts.

Note: Cut the product from the face side of the fabric using scissors or a utility knife. If you use a utility knife use a new blade for each cut. Dull blades can damage the product or produce rough edges.
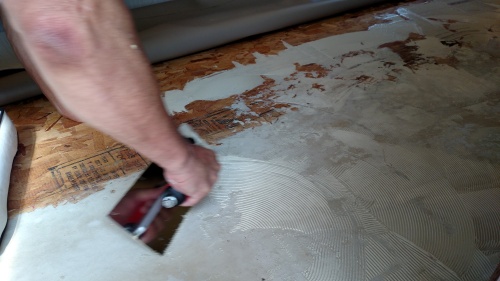 Next you want to apply the adhesive directly to the floor using a trowel. The proper trowel notch will achieve a 100% transfer of wet adhesive to the fabric. Recommended trowel specs are 1/8 x 1/8 x 1/8 V-Notch.

I applied adhesive on half of the floor and after the fabric is in place on that side I will do the opposite side. Allow the adhesive time to get tacky before placing the woven vinyl. Do not allow the adhesive to dry or develop a skin. You can pull the woven vinyl back periodically to check for proper adhesive transfer.
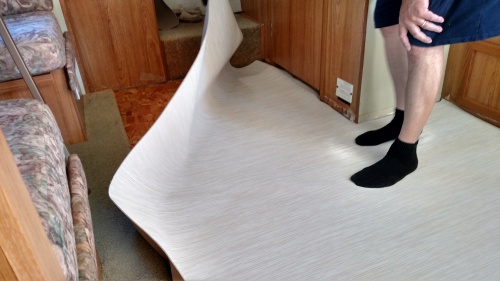
You can use a paint roller, or similar tool to remove air bubbles and to ensure the fabric made good contact with the floor. Use scissors or a razor knife to trim edges as required.

Clean up any wet adhesive with soapy water and a soft bristle brush. Blot the area dry with a clean towel, and be sure to wash any other surfaces clean of adhesive. Dried adhesive should be removed with an adhesive remover.


This do-it-yourself RV flooring project turned out great and we couldn’t be happier with the Infinity Luxury Woven Vinyl flooring. Our new flooring should last a lifetime in the RV. If you are not comfortable doing this kind of job in your RV find a professional installer to do it for you. For more information on Infinity Luxury Woven Vinyl and to look at some of the collections and colors available visit www.infinitylwv.com
Happy RV Learning,
Mark Polk
Watch a video of an LWV installation project in our motorhome:
Subscribe to our RV 101 Youtube Channel
 Happy RV Learning,
Mark Polk


You must be logged in to post a comment.